Showing posts with label twirl. Show all posts

Sunday, September 2, 2012

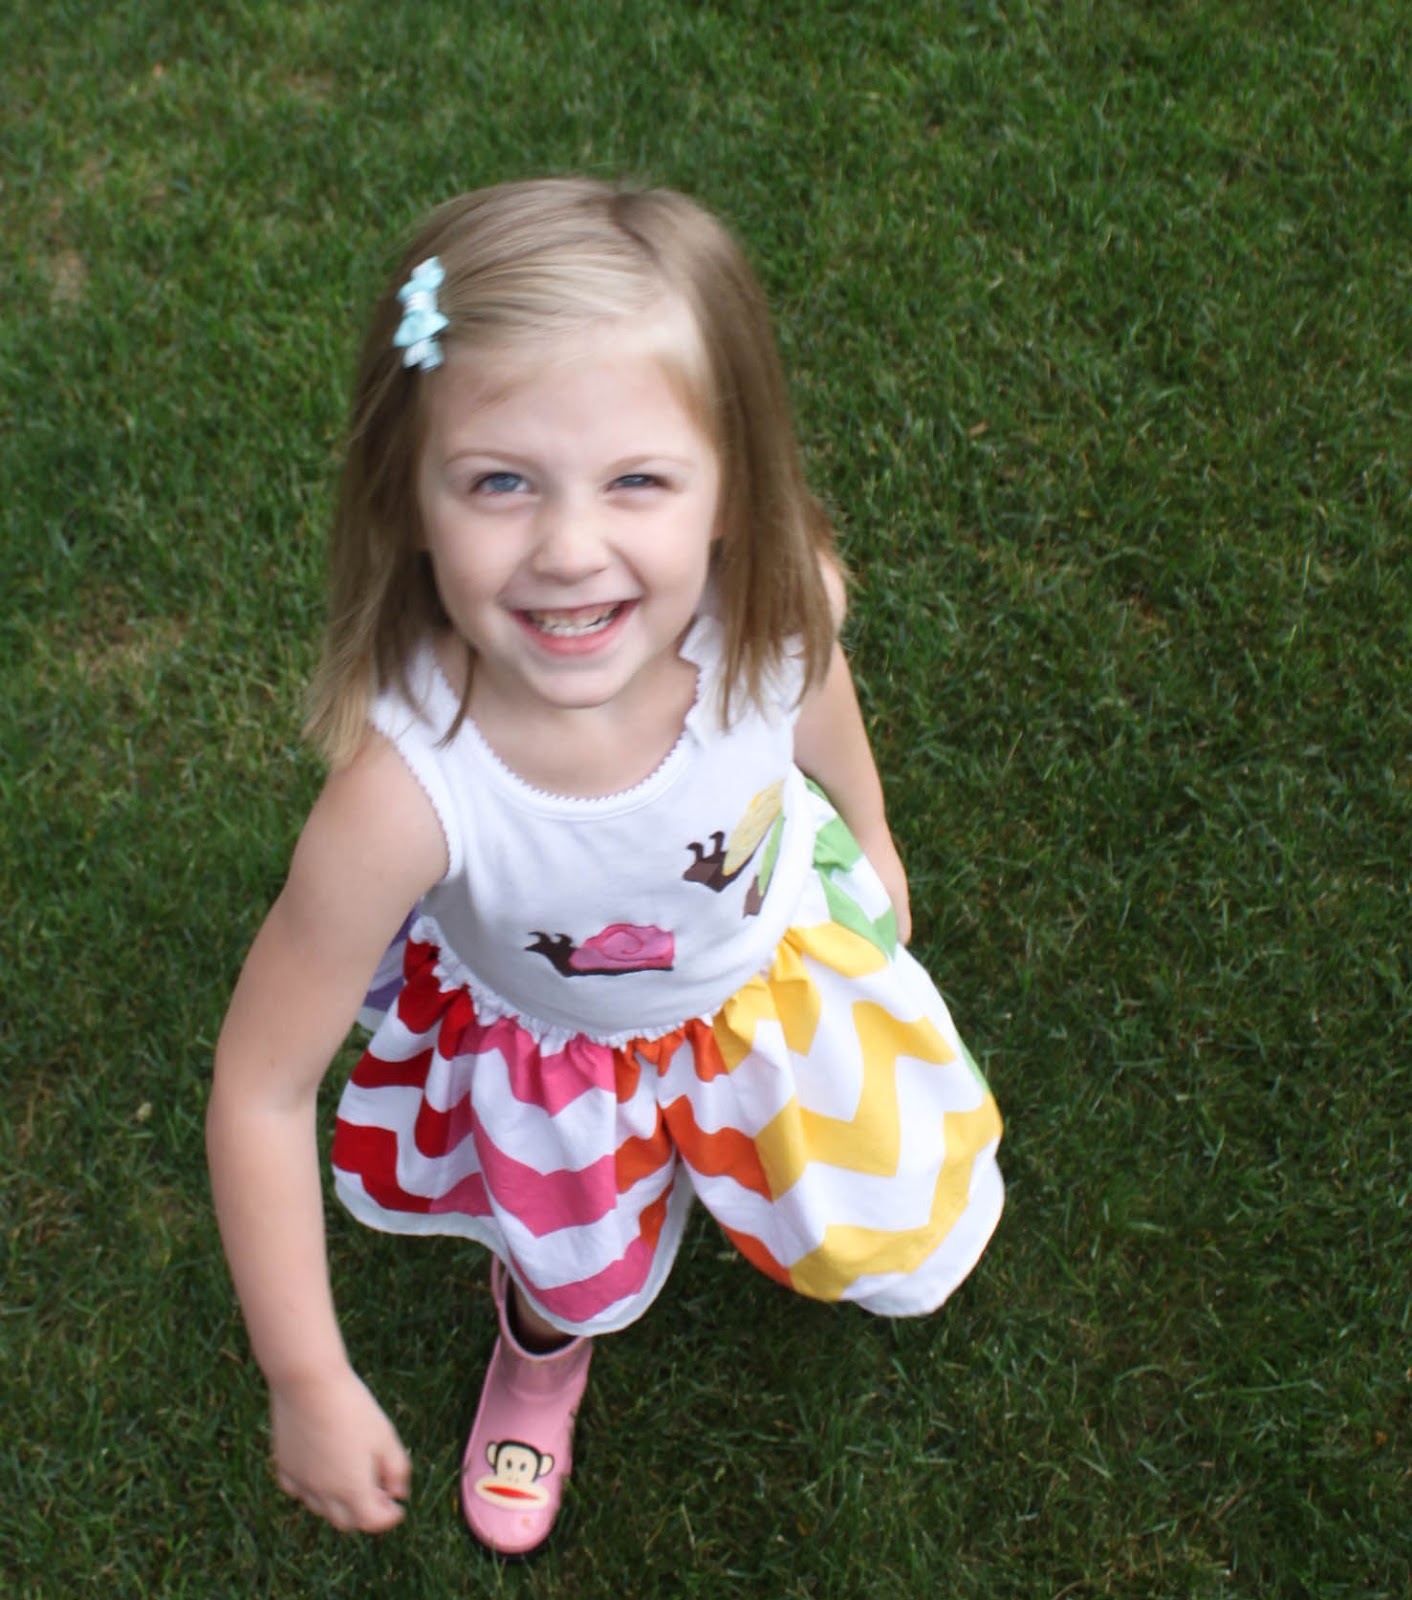
Project Chevron Stash: Rainbow Skirt (and TUTORIAL!)

 This one is super cute.  It's basically a revved-up simple skirt, so here's a mini (super brief) tutorial for you, though you could probably figure it out yourself.
Like the snail tank?  See it a little closer here!
Front:
 Back:

Here are your instructions:
First, you need to cut your pieces, so the chevron lines up.  I like using a 3/8-inch seam allowance, so I cut 3/8-inch from where I want my seam to be (the points of the chevron).  Line your cutting edge up so it's 3/8-inch from the points all the way down.  Cut.  Then do the same on the other side.  You'll see I also cut the top of my pieces right at the points.

Cut it whatever length you desire.  I cut mine 12 inches.  Cut each piece the exact same way.

Once you have all your pieces cut, decide which order you want them in.

Line the edges up carefully.  Use lots of pins.  Then sew together, using that 3/8" seam allowance.  Your stitch will hit on the points.
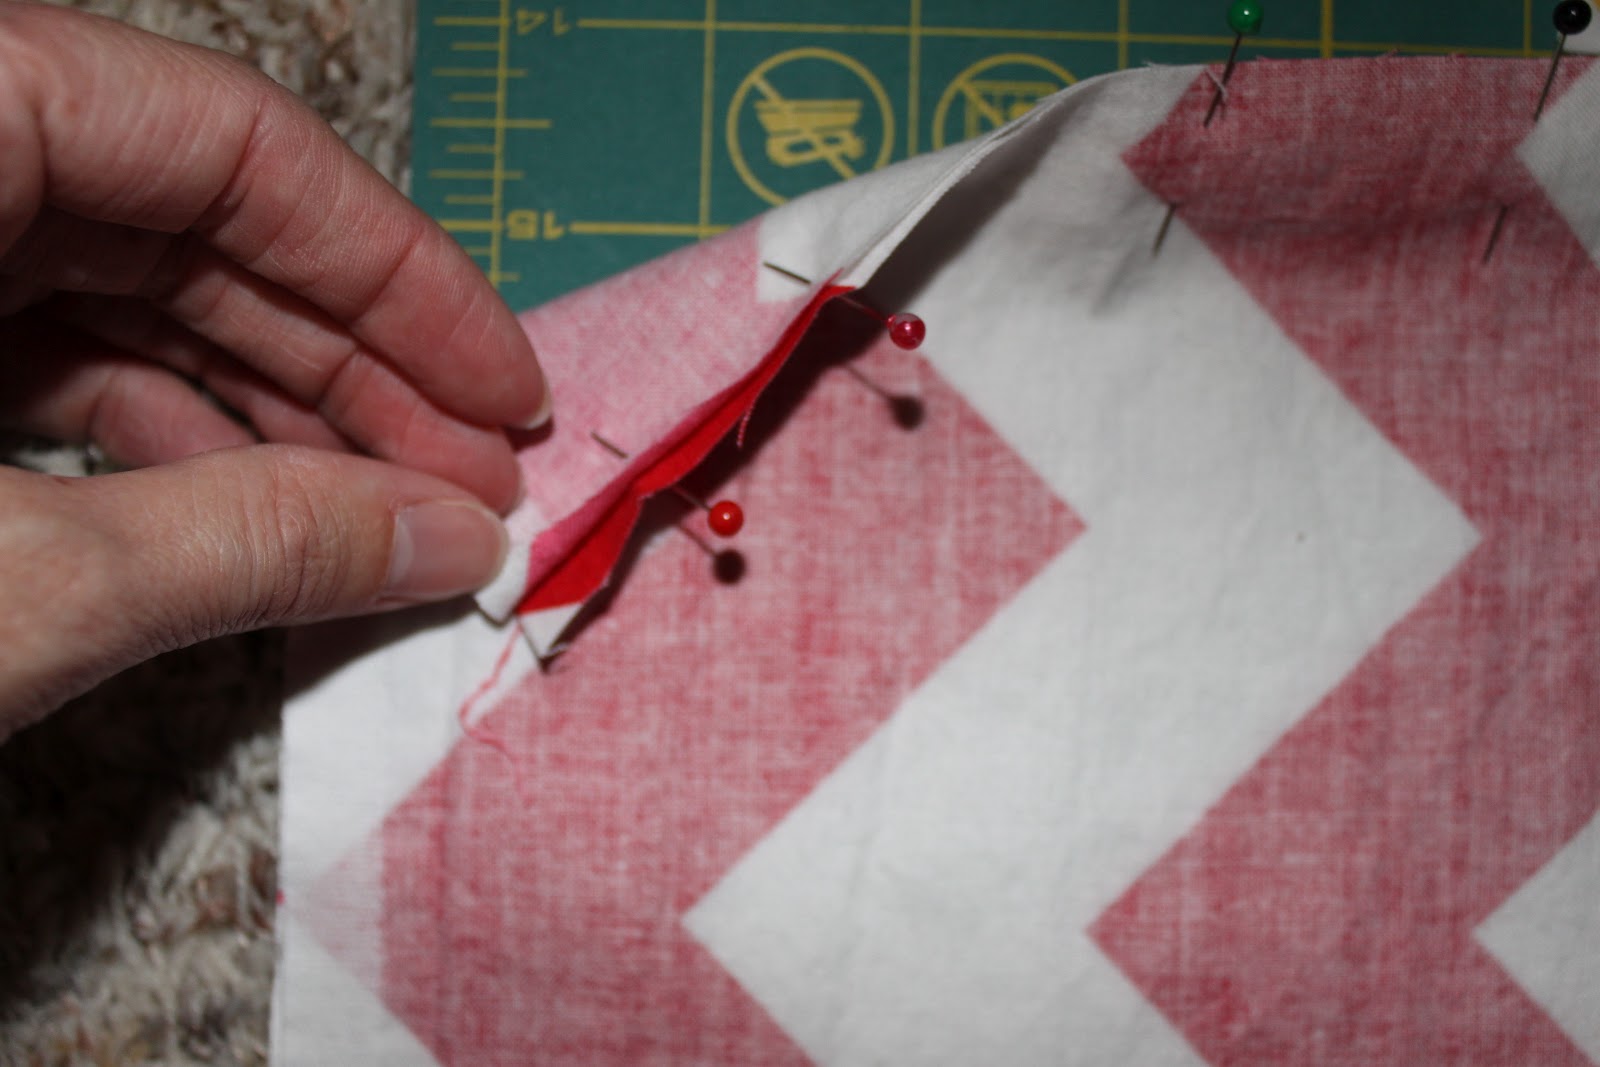
So when you flip it open, it'll look like this.  Yay!  Finish the edge with a zig-zag stitch.  Then continue sewing them all together till you have a big loop.  Hem the whole thing.

Cut your bottom skirt layer the same width of your finished top skirt.  I used Riley Blake's large chevron which measures 4 inches from peak to peak, so each of my pieces were 8 inches.  8 inches times 8 pieces equals 64.  Then I add 3/4" for my seam allowance (or 3/4" on both pieces if you need to cut two.  Since I used an old sheet, I had plenty of fabric).  For the skirt length, I cut mine 14 inches (2 longer than the chevron top skirt).  Sew short ends together.  Hem.

Pin your underskirt WRONG SIDE to RIGHT SIDE of your chevron skirt.  Since my white layer is so thin, you can see how the right side can be seen through.  Sew the top of skirts together.

When you open it up, you'll see the seam from the underskirt, like this.

Press over, so both right sides are showing.

Stitch a casing that's just slightly larger than 3/4".  Leave an opening through which to thread the elastic.  Cut 3/4-inch elastic to desired waist size, thread through (you'll just thread it in between the two skirts).  Close your casing.  Done!


Friday, August 3, 2012

Pink Elephants on Parade Dress Tutorial

Don't forget to enter the giveaway here!  It closes Sunday night!

I got this elephant fabric for $.50/yard at Walmart!  Fifty cents a yard, people!  Nice!  The only thing is that it's very baby, y'know?  And the only baby I have is a boy, and he's not going to be sporting pink and purple elephants. As luck would have it, though, we were getting together with some good friends today, and one of those friends is a 7-ish month-old little lady.  Thanks for posing for me, Addie! Obviously, this dress looks much better with you in it. :)

Materials:
Pattern

Main fabric, about 1/2 yard
Underskirt fabric, 10"x selvage to selvage
1/4-inch elastic
coordinating trim
fabric marker
basic sewing stuff

Instructions:
**Use 1/2-inch seam allowance throughout.**

First, cut out your pieces.  Use the pattern for the bodice, and the straps will be 2.5" x 6.5" (mine in the picture are too long... don't get confused).

For the skirt portion, cut from selvage to selvage.  Your main fabric will be 8 inches long.  The longer layer will be 10 inches.

We'll start with the bodice.  Fold your straps in half, sew up the long side.  Press with the seam in the center.

Cut your trim to 6.5".

Center the trim on the strap and sew on.  My trim is a velvet and organza ribbon.  I ran a line of stitching down both sides of the velvet.

Measure 2 inches out from the center of your front bodice piece and baste the straps on, close to the edge, with right sides together.

Measure 2.5 inches from the center of the back and baste the other side of the straps there.

It'll look like this when you're done.

Sew up the side seams of your main (strapped) piece and your lining piece.

Turn the lining right side out and pin it to the main piece, so the straps are sandwiched between the two.

It'll get a little bunchy in there, but that's ok.

Sew around the whole top edge then flip and press.

Topstitch close to the edge.

Your back piece is longer than the front, so that we can elasticize it.  Use a fabric marker to draw a line, 3/4-inch away from your top stitching.  The line will go across the entire back piece.  Then draw a second line, again 3/4-inch below.

Stitch along these lines.

Cut 2 pieces of 1/4-inch elastic to 9.25 inches.  Use a safety pin to begin threading it through your casing.

Once I pull my elastic close to the beginning of my casing, I pin it in place.

Once I finish pulling it through, I pin in place on the other side.  Then do the same with the other piece of elastic and the second casing.  Then you can stitch them in place with one continuous line.

I actually did a double line of stitches to make it extra durable.

Now grab your skirt pieces and sew up the side seams on both of them.  Finish with a zig-zag stitch.

Keeping them both inside out, place them together, with main skirt inside the underskirt.  Pin together at the top.

Run a gathering stitch along the top and gather both skirts up at the same time, until they match the bodice width.  KEEP IN MIND-- your back is bigger than the front.

Once you have the skirts gathered, slip the bodice inside, so right sides are together.  Match up one side seam with the side seam of the skirt.  Pin.

Sew through all four layers and finish with a zig-zag.

Flip and you've got your self a dress!

Wednesday, July 11, 2012

Dress Up Days Dresses

I recently made a dress for my friend, Erin.  It will be revealed soon, but you have to wait for it.  It'll be worth it.  The reason I tell you this is that I had to order the fabric, and when you order over $35 worth of fabric at fabric.com, you get free shipping.  I figured that it would just be silly to NOT reach that $35 mark, so I had to throw a few extra yards in there.  Just being smart, y'know? :)  Anyway, I browsed around and immediately fell in love with Riley Blake's Dress Up Days line.  Oh, Riley Blake, you get me again!  You're so good.  I've included links to all the different fabrics, too.  You are oh-so-very welcome! :)  You'll probably fall in love, too.


Here are the details on Riley's dress.  (By the way, I only just really thought about the fact that the fabric is Riley Blake and my Riley is wearing it.  I'm, clearly, losing my mind.)  Her main fabric is the Clothesline Orange.  The collar, straps and belt are from the grape floral.  Her little flower is the grape damask.


I call this pose "I'm a '50's housewife.  Welcome to my party!  Would you care for some deviled eggs or cream cheese and celery?"

And this is her "model pose."  Pretty good.  I'd hire her.  

I recently discovered that Riley really likes two things, getting-dressed-wise: elastic and accessories.  Therefore, I had to give her this belt.  The dress can be worn on its own.  However, I wanted to throw in a cute gathered belt for her.  She loves pulling it off and on.  I'm sure it will, somehow, accessorize some other random outfit soon. :)

Noelle's dress has a pieces bodice. Her main fabric is the green bikes, but it also has adorable wagons with little teddy bears!  The coordinating fabrics, as you can see, are the same as the first dress.

The only vision I had for this dress, initially, was some kind of piecing.  I was going to do it all the way down the sides of the dress, but then I thought it would be fun to have a whole pieced center panel. 
 And I like how, since the skirt part is gathered, the panel flairs out at the bottom.  Plus, those pops of grape against the lighter hues are awesome.

My girlies liked dressing up.  Riley actually requested that she keep hers on (not always the case after our "photoshoots").  

I will happily post tutorials for both... Any takers??