Showing posts with label skirt. Show all posts

Tuesday, September 25, 2012

Pirate Queen Layered Skirt Tutorial

Part 2 of the Landlubbers' Guide to Pirate Wear!  For the corset top, go here! :)

When Riley chooses her clothes (which is almost every day) and when there are twirly skirts in her drawers (which is quite often), she will almost always emerge from her room, decked out in one of said skirts.

So as I was sketching out pirate costumes for all the cousins, I knew Riley would need to have a skirt... preferably a circle skirt for its amazing twirl-ability.  So here's what I ended up with.  It takes only a short amount of time (especially if you use knit that doesn't fray-- no hemming!!) and it's great for a classy, twirl-lovin' pirate.
** This tutorial is only for the overskirt and doesn't include the tulle underskirt (which is just tulle sewn onto elastic)**
Materials:
black knit fabric
pirate stripes knit fabric (got mine at Jo-Ann's)
1-inch elastic, either red or black.

Instructions:
**My measurements are for a (skinny!) 4T skirt but can very easily be adjusted!**

Essentially, you just want to follow Dana's Circle Skirt tutorial, but one of your "circles" will be a square.

Fold your striped fabric in half horizontally then vertically.  Measure 10 inches from each edge and cut a 10" square. 

For your waist circle, consult Dana' s tutorial (from the link above).  My radius was 3.5".  Round out the corner of your square.  I wish I hadn't rounded mine quite as much.  Meh.

When you open it up, it'll look like this.  Make sure you forget to crop your pictures so that people will see your iPhone and know you have street cred.  Then mention how you KNOW you didn't crop your pictures, so everyone knows that you were way too lazy to go back and do anything about it.  

Now make a circle skirt with your black knit.  I measured mine out 14" from the center.  Use the same waist measurement you used for the striped piece.

Stack your striped square on top of your circle.

Cut your elastic for your waistband (mine was 20").  Sew together and sew the seams down.

Pin your two layers together, just so they stay put.  Then sew on the elastic how Dana taught you how!  Just make sure you're sewing through both skirt layers!

Easy, right?  And it's even better if you make a tulle underskirt, so it's twirly and full!  :)

Sunday, September 2, 2012

Project Chevron Stash: Rainbow Skirt (and TUTORIAL!)

 This one is super cute.  It's basically a revved-up simple skirt, so here's a mini (super brief) tutorial for you, though you could probably figure it out yourself.
Like the snail tank?  See it a little closer here!
Front:
 Back:

Here are your instructions:
First, you need to cut your pieces, so the chevron lines up.  I like using a 3/8-inch seam allowance, so I cut 3/8-inch from where I want my seam to be (the points of the chevron).  Line your cutting edge up so it's 3/8-inch from the points all the way down.  Cut.  Then do the same on the other side.  You'll see I also cut the top of my pieces right at the points.

Cut it whatever length you desire.  I cut mine 12 inches.  Cut each piece the exact same way.

Once you have all your pieces cut, decide which order you want them in.

Line the edges up carefully.  Use lots of pins.  Then sew together, using that 3/8" seam allowance.  Your stitch will hit on the points.

So when you flip it open, it'll look like this.  Yay!  Finish the edge with a zig-zag stitch.  Then continue sewing them all together till you have a big loop.  Hem the whole thing.

Cut your bottom skirt layer the same width of your finished top skirt.  I used Riley Blake's large chevron which measures 4 inches from peak to peak, so each of my pieces were 8 inches.  8 inches times 8 pieces equals 64.  Then I add 3/4" for my seam allowance (or 3/4" on both pieces if you need to cut two.  Since I used an old sheet, I had plenty of fabric).  For the skirt length, I cut mine 14 inches (2 longer than the chevron top skirt).  Sew short ends together.  Hem.

Pin your underskirt WRONG SIDE to RIGHT SIDE of your chevron skirt.  Since my white layer is so thin, you can see how the right side can be seen through.  Sew the top of skirts together.

When you open it up, you'll see the seam from the underskirt, like this.

Press over, so both right sides are showing.

Stitch a casing that's just slightly larger than 3/4".  Leave an opening through which to thread the elastic.  Cut 3/4-inch elastic to desired waist size, thread through (you'll just thread it in between the two skirts).  Close your casing.  Done!


Thursday, August 16, 2012

Sewing for ME: The Tanya Skirt Tutorial

**I've been sitting on this tutorial for quite some time now, waiting to get a picture of me in my new skirt.  But life happens.  And today, it's raining, so I'm just going to post the tutorial now, so you can make yourself a cute skirt ASAP! :)  Here's one picture of mine, shot by the only on-hand photographer: Riley.  Everyone knows that the best possible angle from which to have a picture taken is from the ground up... ;) **

But, seriously, how adorable is Tanya?!

I have never sewn anything for myself.  Never.  It's been a little too terrifying.  But after I made this skirt for Tanya, I knew I had to have one.  Look at me, being so super brave.  Plus, I had just found this subtle gray-on-gray chevron fabric, so I had to put it to good use.  This skirt has a fitted waistband and is super full.  If you don't like how full it is, then you can easily just adjust the width, so you don't cut all the way from selvage to selvage.  The length is easily adjustable as well.  Nice, eh? :)

Materials: 
About 1.5 yards fabric, depending on desired length
8-inch zipper
sewing stuff

Instructions:
First you need a couple measurements.  Get your waist measurement-- your natural waist since this is a high-waisted skirt.  Then decide how where you want your skirt to hit on your leg.  Measure from your waist down to that point.  Then you just do a couple simple calculations:
For the waistband: 2 pieces, waist +1.25 inches by 4.25 inches
Skirt: 2 pieces, desired length - 2.25 inches by width of fabric
Belt loops: 1 piece, 2 inches by 10 inches

Cut these pieces.  If you want pockets, cut those, too.  Just cut four pieces in roughly the shape below.  (Also make sure two of the pieces are flipped, so you can place them right sides together.)

Waistband pic:

Measure down about 8 inches from the top corners of your skirt pieces and mark with pins.  That means you'll have 8 places marked where you're going to put your pockets.

Place top of pocket at pin, right sides together.

Sew them all on, using a 5/8" seam allowance and zig-zag that portion to finish.  Technically, you could zig-zag the whole side, but since you cut to the selvage, it won't fray.  Time-saver!  Boo-yah!

Flip your pocket out, like so, and press.  You'll see that I wanted a fun little hidden pop of color for my pockets.  I'm just full of surprises like that...

Take your pieces for your belt loops. 
 

 Fold the edges into the center.  Press.

Then fold it in half.

Stitch close to both edges.

Then snip the whole thing in half.

Find the center of one of your waistband pieces (marked with a yellow pin below).  Place one belt loop slightly off-center.  They're going to be way too long, but that's ok.  Since I did mine with a chevron print, the extra length allowed me to line of the lines.  Nice!

Place your other belt loop on the SAME HALF of the waist band, 1.5 inches from the edge.

Place the other waistband piece, right sides together, over the whole thing.  See how both belt loops are on the same half?

Use a 1/2-inch seam allowance and sew just the tops together.  When you're done, snip off the excess belt loop.

Flip right sides out, press, and topstitch the top edge (and belt loops).

You'll only have one finished edge at this point.  Tack down the bottom of your belt loops at this point.

Now grab your skirt again and sew up just ONE side, using a 5/8" seam allowance.  Your stitching should line up with the stitching you did to sew the pocket on.

After you sew it, finish the pocket with a zig-zag stitch.

Run a gathering stitch along the top of your skirt piece.  I actually like to do two, since it's such a big piece.  Gather the skirt till it's the width of your waistband.  Make sure the side seam lines up with the center of your waistband (this also ensures that your gathers are a little more even).

Also, when you gather, leave the 1.5" by the edge ungathered/flat.  This will make it easier to install your zipper.

Sew waistband to skirt and finish with a zig-zag.

Press the seam allowance up toward the waistband.

Topstitch along the bottom of the waistband, securing the seam allowance below and giving it a nice, finished look.

Zig-zag those last raw edges of your waist band (and the whole side seam if you wish, but again, you have the fray-free selvage there!).

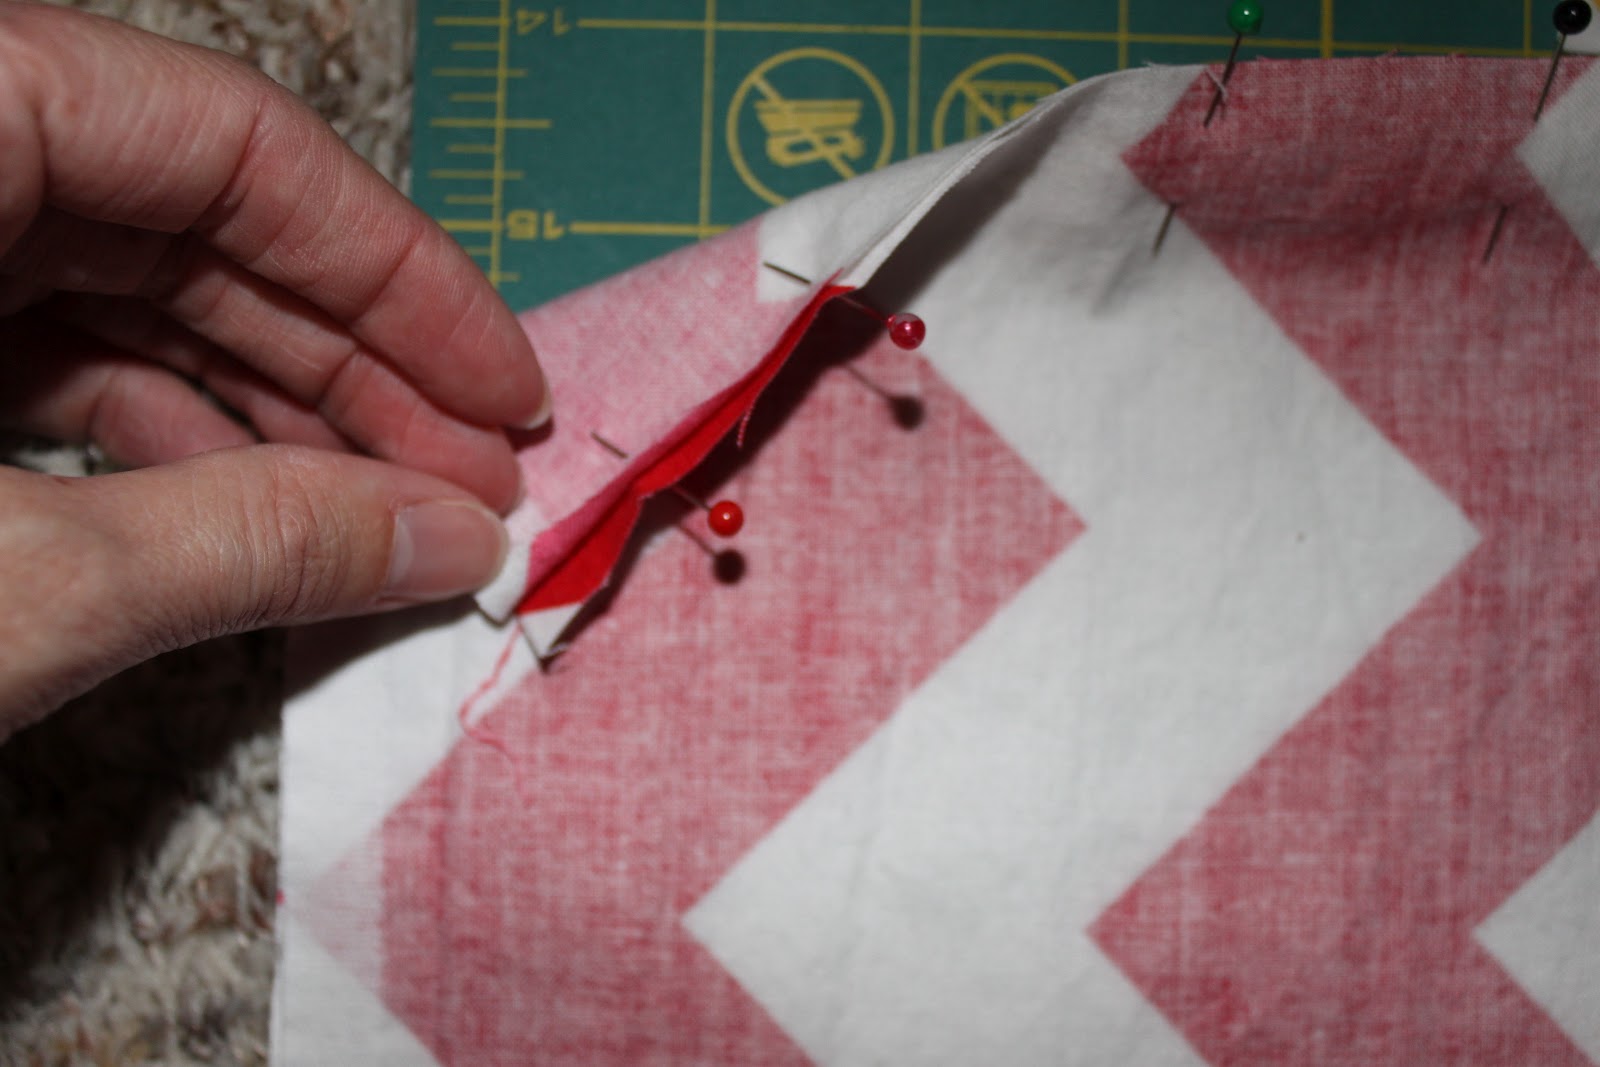
Get ready to install your zipper.  Here's a good tutorial from Sew, Mama, Sew!  I marked where I need to stop basting with a double pin.
  Press out, continue with the install...

Add a hook and eye and you just finished a skirt... for yourself... and it's cute!!

However, let's not let those beltloops go to waste.  Make sashes (or use a storebought belt) in whatever colors you want!