
Materials:
About 1/2 yard main skirt fabric and straps
1/4 yard fabric for head and neck
Fabric scraps for eyes, "nose", and horns
Steam a Seam
Snaps/buttons
Giraffe pattern, found here
Sewing gear
Instructions:
This little number is basically a cute little jumper with a giraffe smacked on it, so it's really pretty simple. I do take a few shortcuts which, I think, make it a little easier. So let's start with the simple part-- the jumper base!
First, cut out your pieces. Your skirt will be the width of your fabric by the length you want plus 1 inch (for hemming and seam allowance). I want my skirt 15 inches, so I cut out a piece that is width of fabric by 16 inches. Also cut your bodice piece. This should be 12 inches by your waist measurement plus 1 inch. I wanted my waist to be 23 inches, so I cut it 12" x 24". When you get that cut, stitch the short sides together then fold it over, wrong sides together. Not a great pic, but hopefully you get the idea. Make sure your raw edges are lined up, press and then topstitch close to the fold (which will be the top of your bodice piece).


It'll look like this when you open it up.

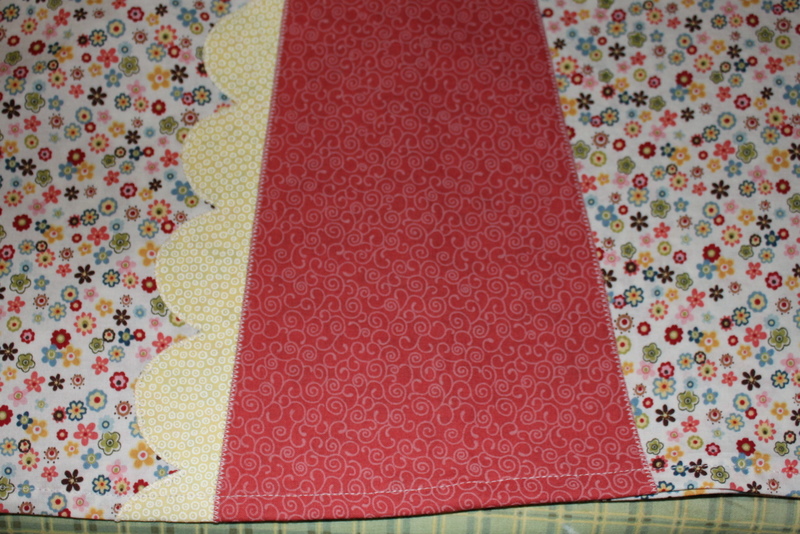
Now we need to scalloped edge of the giraffe's neck. Cut a strip 2 inches wide and long enough to extend down the giraffe's neck. Iron some Steam a Seam to the wrong side of the fabric (with the backing still on!).
** see my owl tutorial for Steam a Seam tips!**
Place it slightly under the neck piece. Then just draw some scallops. They don't have to be perfect; have you ever seen a perfectly scalloped giraffe in real life? ;)

Cut those scallops out. Now you have a couple options for the neck-- you can pin it in place or use Wonder Tape or Steam a Seam. It's up to you. Position both pieces, covering the seam of your skirt piece (no seam showing! Nice!!). Iron the scallops in place. Then zig-zag stitch over the neck and scallops.

Turn your the bottom 1/4 inch to the wrong side, then a quarter inch more. Press and stitch to finish your hem.

Gather the skirt in until it's the same width as your waist piece. Flip the waist piece down, lining up the seam (that seam will be covered, too!) and all the raw edges and stitch. Then finish those raw edges off with a zig-zag stitch or serger.
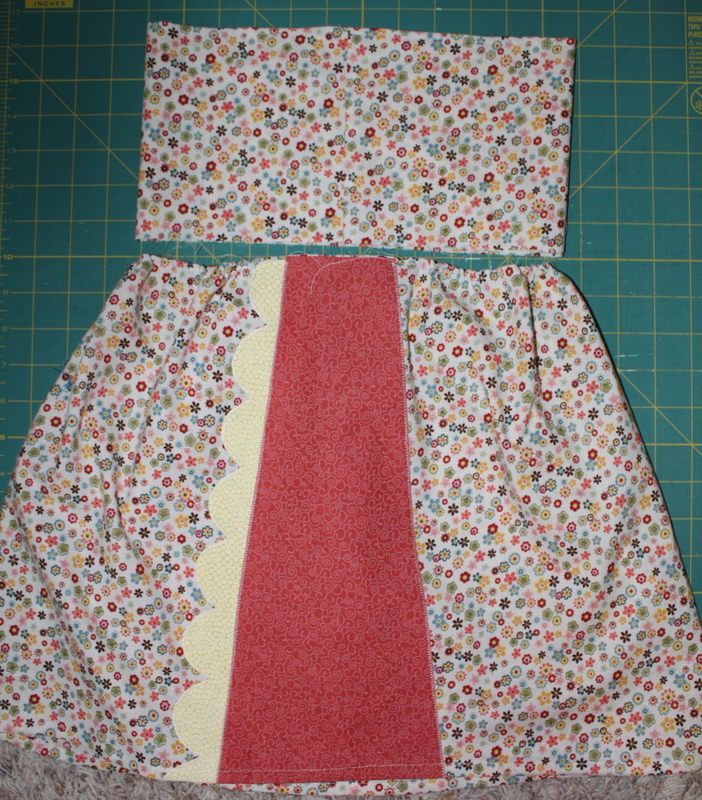
Flip that waist piece up and you have this!

"But wait!" you say, "There are no straps! Come on, Heather!" Here's one of my cheats, so it's easier to get the strap positioning. See, the front and center of your bodice piece is going to be covered by the giraffe's face, so we can just sandwich the straps in between the bodice and the giraffe head.

Cut two pieces of fabric, 3 inches by 26 inches. These will be your straps. Fold them right sides together (so they're 3" x 13"), stitch up the sides and flip them right side out. Then press.
You have that seam to show you the center of the bodice piece, so, using that, place your straps so they angle out slightly. These won't show, remember. I zig-zagged the bottom and then did a little topstitching that lined up with the stitch I did on the bodice. Click the picture for a better look.

Now to the fun part! That cute giraffe face!
Cut out your pattern pieces. To add the details to aforementioned cute little giraffe face, we're just going to do some basic applique. Again, see the owl jumper tutorial for my applique tip (but look there BEFORE cutting your fabric!!). Place the "nose" and eyes on your main front face piece. Iron them on and zig-zag stitch for a finished look.
See how my nose didn't totally line up (crummy cutting on my part). That's fine! Once you get the backing on, you won't see it.

Stitch the two backing pieces together, leaving an opening of 1.5" in the center. You'll use this to turn the face right side out.

Press flat.

Cut out your ears and horns. Sew them, right sides together. Flip and topstitch.

Now place them on the face, like this:

Cover all that with the backing, making sure that you have the horns and ears pinned in place. Then stitch all the way around!

Turn it right side out, using that hole you left the backing.

Press flat. No need to stitch up the hole as it won't show. DO NOT TOPSTITCH around the edge yet, though.

First, you need to place the head on your bodice. See how the edges of the straps, the bodice seam and the hole in the head backing are all hidden now? Awesome. NOW pin your face in place... I'm a rhymer, and I didn't even know it! ;)
Topstitch around the face. Voila!

Grab your snaps or buttons and put them on, according to the manufacturer's instructions. I put the dress on Riley and marked where I wanted them. Sorry for the lack of pictures. Let me know if you need clarification.
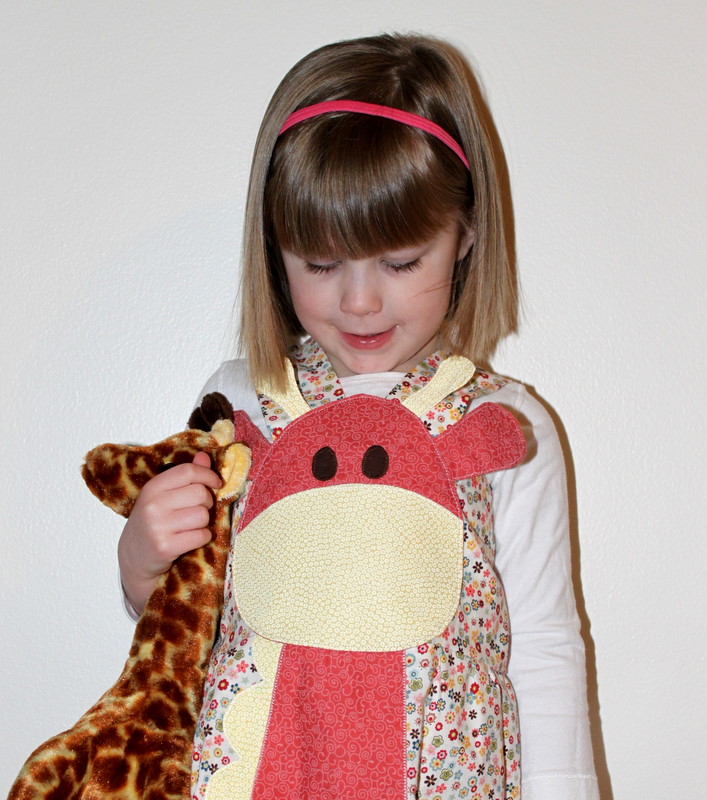
After you get that done, YOU'RE done! It's great on it's own or over a shirt and/or leggings!
And it's even better when you have a giraffe friend. :)


Linked up at...

So cute Heather! Great job--you make it look easy! The giraffe would be good for a little boy's shirt in different colors too.
ReplyDeleteYou are SO incredibly creative, Heather!!! It's fabulous!!!
ReplyDeletePam! For some reason, I can't post a comment on your blog! Argh. LOVE the bloomers and the accompanying story! :)
DeleteYou DID it! WOW! So, so cute. You have quite a talent!
ReplyDeletethat is the sweetest thing.......I'd love for you to share this @CountryMommaCooks Link & Greet party..This weekend...Have a great day!
ReplyDeleteOh my....that is just adorable!!!! So creative!!!!
ReplyDeleteThis is so retro and cute I know my girls would just die for that dress!
ReplyDeletePlease come share this at:
www.ladybugswithzoi.blogspot.com
That is so darling! What a good little model you have!
ReplyDeleteIf you're interested, we're hosting our first ever link up party. Please stop by and link up! http://www.waywardgirlscrafts.com/2012/01/wayward-weekend-week-1.html
I love this! Great jumper and fab tutorial!
ReplyDeleteI am going to have to scale this sweet pattern down to make a dress for my friend's baby girl.
How fun!! Make sure to post pics at the Flickr group if you do! :)
DeleteI spotted this on pinterest and just HAD to make a version for my daughter. I'm watching the opening ceremony for the Olympics and cutting out the pieces.
ReplyDeletethanks!
That's awesome! Send pictures when you finish!! :)
DeleteI'm confused on the part that says (width of your fabric) what is the exactly?
ReplyDeleteHi,
ReplyDeleteVery innovative design of the jumper. I featured it here:
http://sewprettysewfree.blogspot.com/2013/04/giraffe-jumper-sewing-pattern.html
Thanks,
Anshu
You could make some adjustments to this to turn the bottom part into shorts and attached snaps for toddlers both boy and girl!
ReplyDelete