Materials:
store-bought headband (you can get them at the dollar store!)
3 coordinating ribbons
1 fabric scrap, 4 inches by 16 inches
felt
fabric/craft glue
sewing machine
needle and thread
This headband came together by me fiddling with stuff and just adding till I got what I wanted. So you can really make a gazillion variations of it. :)
First, I took one of my ribbons and pleated it. I just did this kind of lackadaisically, but I'm sure you can find some tutorials on making perfect pleats if you google it. I just folded the ribbon so it looks like this, pinned it and stitched, lengthwise, down the middle.


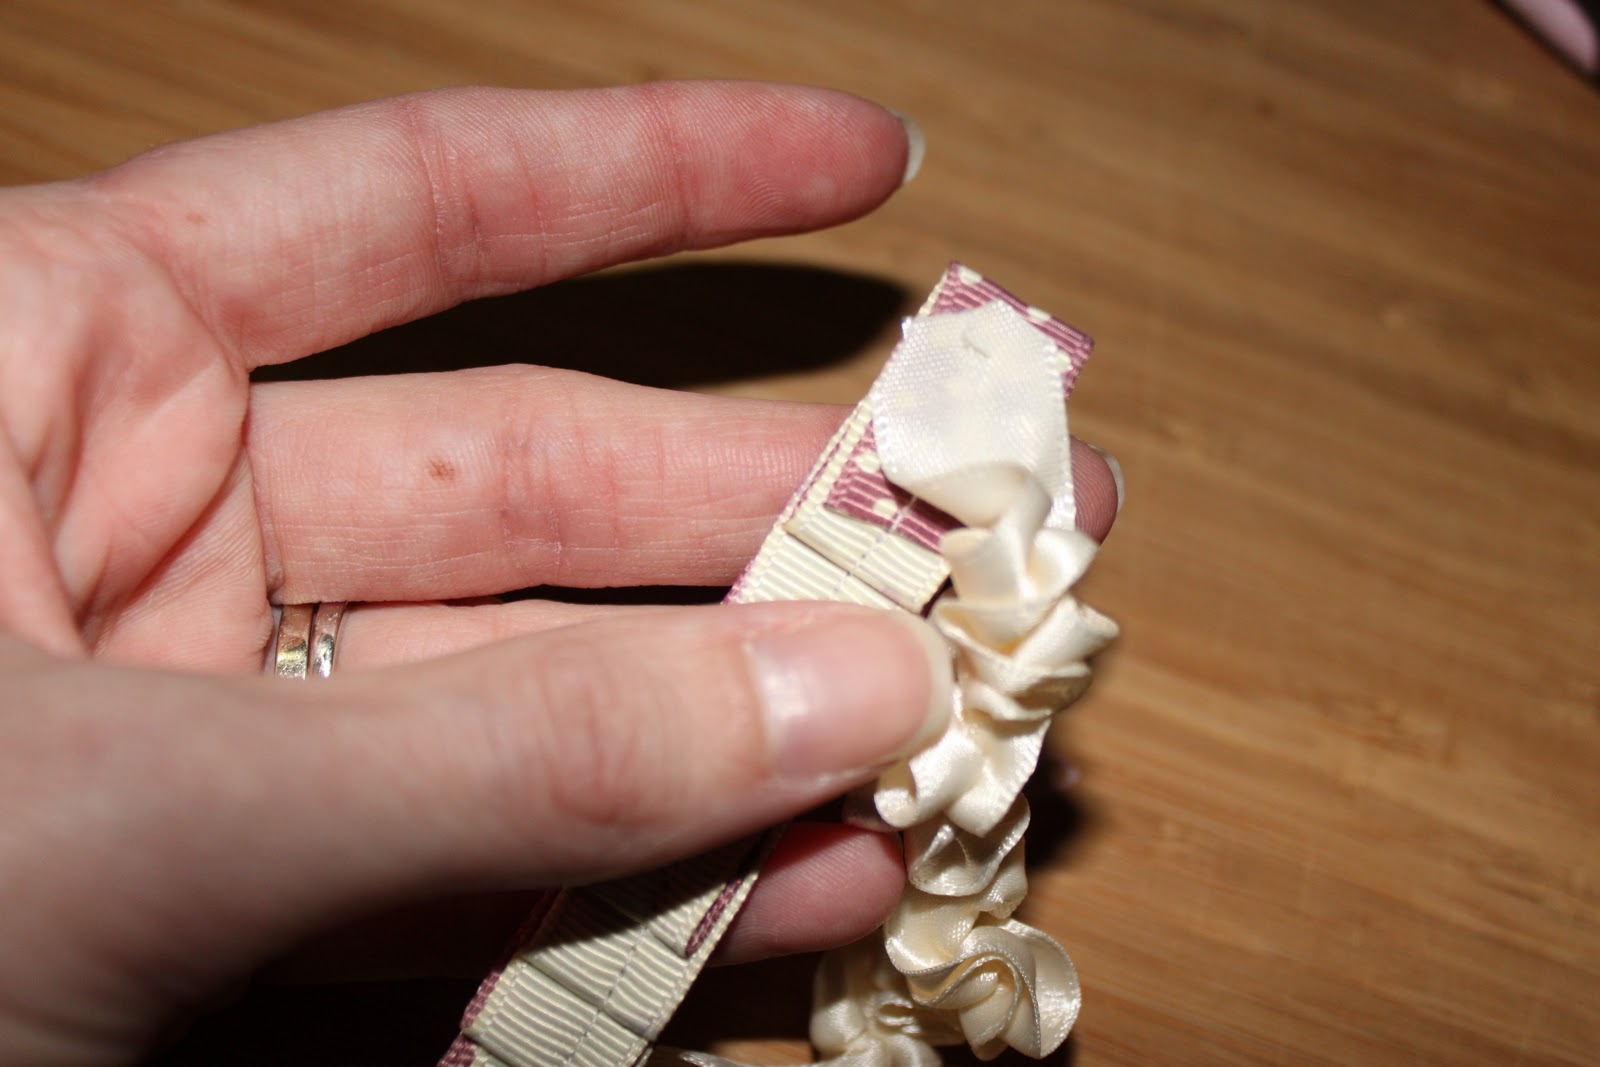
Next, I took my other ribbons and stitched a gathering stitch down the middle. I tied the threads at one end and gathered from the other end. I made the cream one pretty tight and the brown one really tight.

I glued the ends of the cream ribbon under my pleated ribbon. I then glued both ribbons onto a piece of felt. However, I don't really trust glue, so I feel better after I add a few stitches. I did this by hand, making sure that the gathering of the ribbon hid the stitches.
At that point, my camera battery died, but there are only so many minutes in naptime, so I kept going, sans pictures. Sorry!
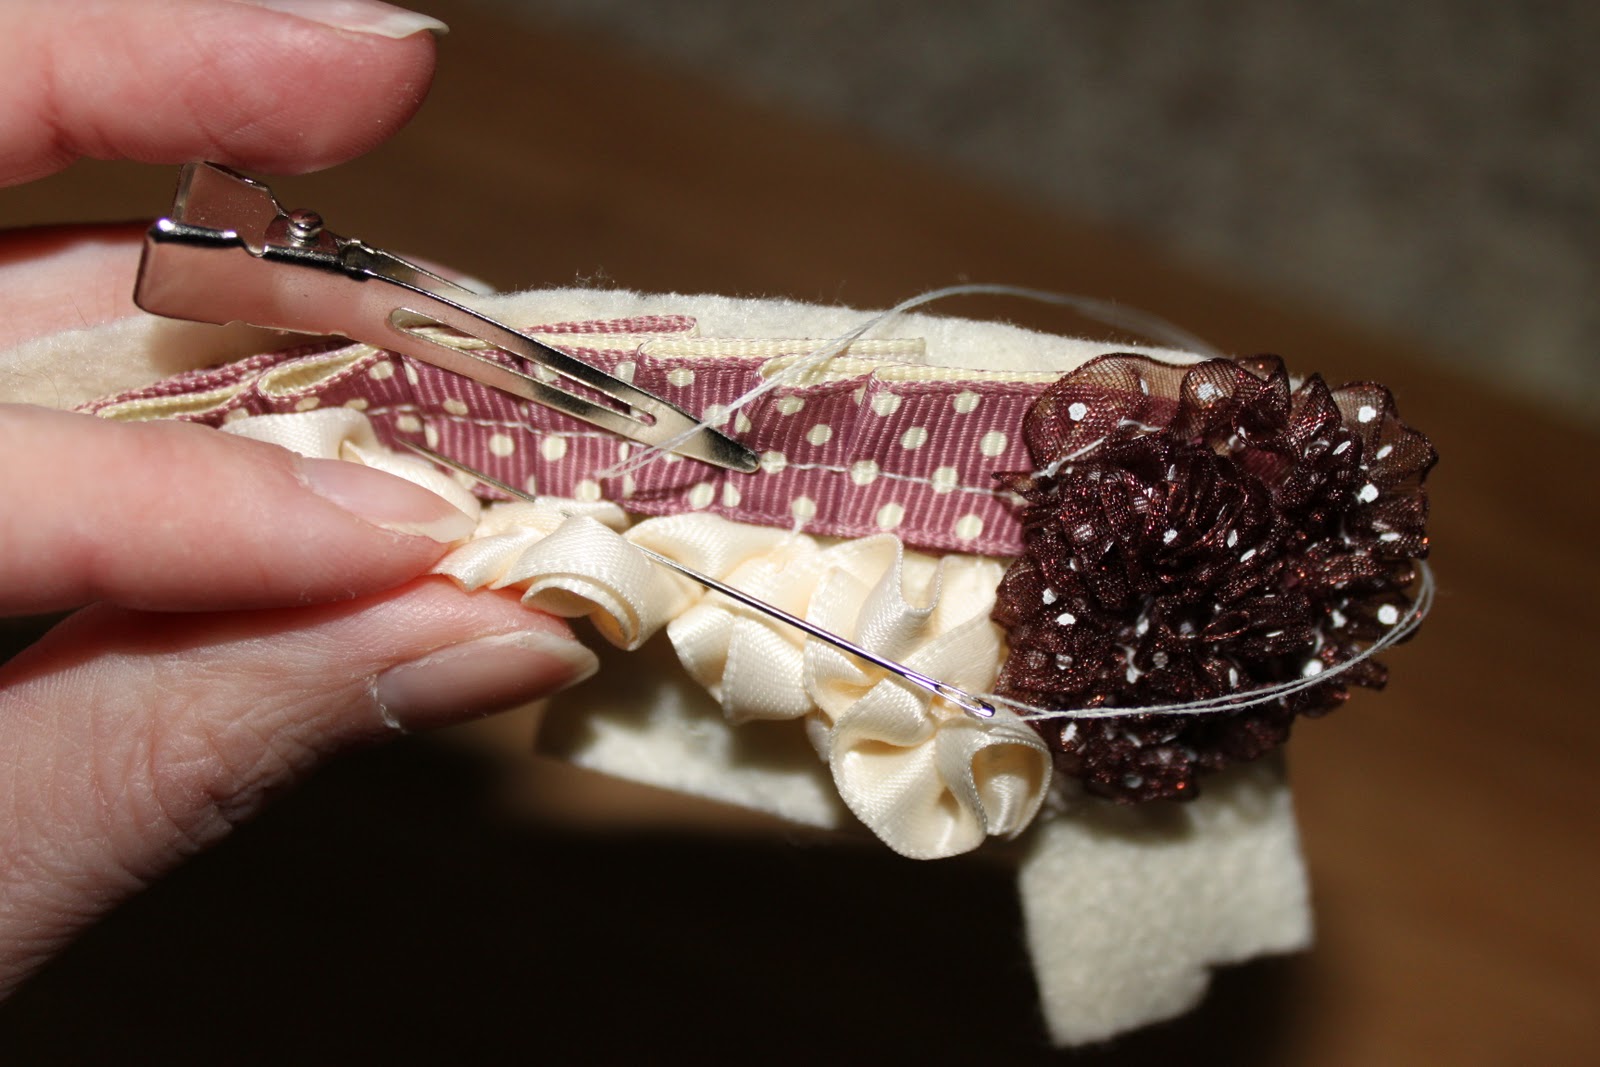
I then took my brown ribbon and wound it into a little flower that I also stitched on by hand, going through the other ribbons and the felt.
I then trimmed the felt, so you couldn't see it beneath the ribbons.
I still wanted my headband to stand out a little more, so I grabbed my scrap of fabric and gathered that till it was the same length as my ribbon, uh, thingy.
I put glue down the center of my fabric (right side), following the stitch line. I positioned this under my headband. Then I sandwiched the headband between the fabric and ribbons, adding more glue where necessary. I let that dry a little. Then I took my needle and thread and secured the fabric and ribbon/felt to each other, around the headband.
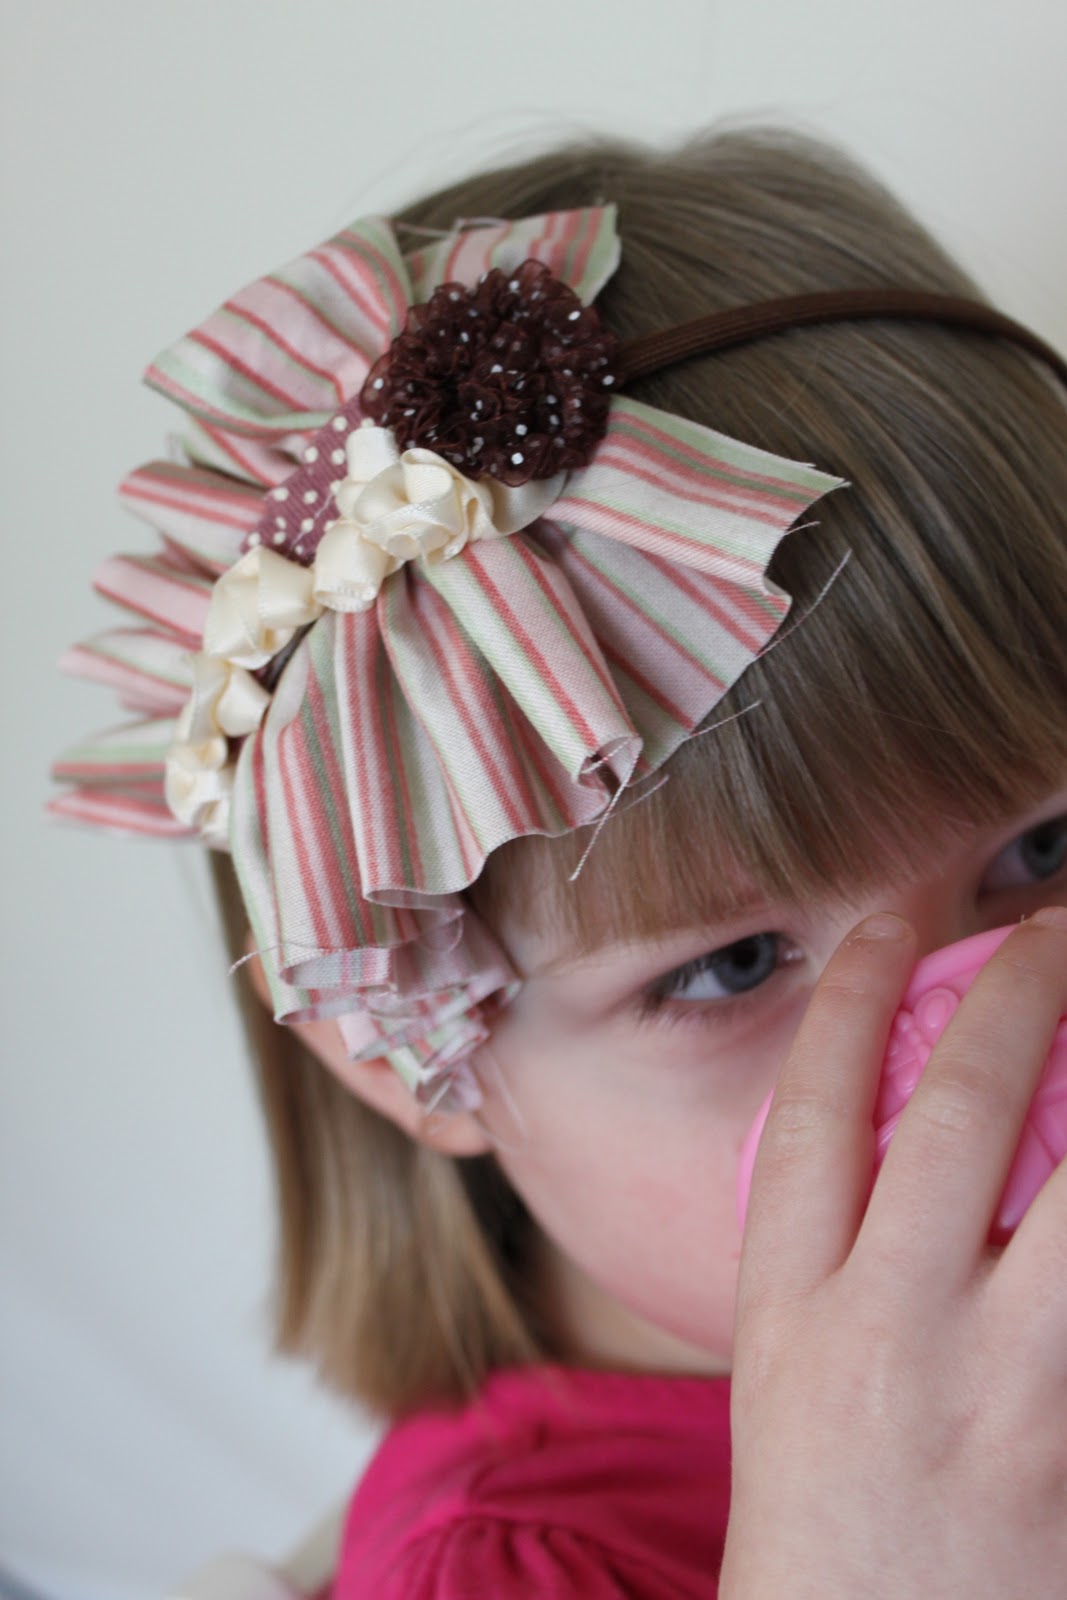
Done! It's the perfect tea party accessory!

I love these headbands!! I am definitely going to attempt to make a few of my own :)
ReplyDeleteps: I want to visit you Wheatonites in the upcoming months, so please keep an eye out for a free weekend when you have a room to spare :D
Hi Heather, what a delightful headband and your little girl is adorable. Thanks for sharing. I have recently found your blog and am now following you, and will visit often. Please stop by my blog and perhaps you would like to follow me also. Have a wonderful day. Hugs, Chris
ReplyDeletehttp://chelencarter-retiredandlovingit.blogspot.com/